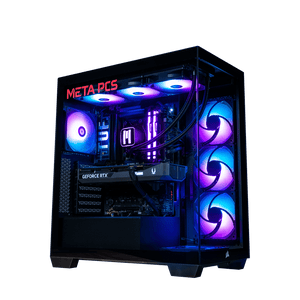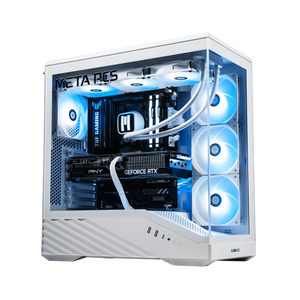





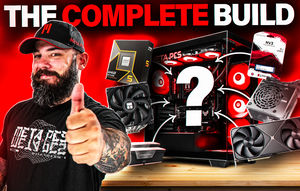
Building a gaming PC in 2026 comes down to twelve steps and about three hours of hands-on time once your parts arrive. Pick a CPU and GPU that fit your target resolution, an AM5 or Intel LGA1851 motherboard that matches the CPU, at least 32GB of DDR5, a Gen 4 NVMe drive, a real 80+ Gold power supply with headroom, and a case with airflow that fits your GPU. Assemble in the order motherboard-CPU-cooler-RAM into the case, then GPU, storage, and cables. Enable Secure Boot, TPM 2.0, and Resizable BAR in BIOS before you install Windows. That's the whole thing. The rest of this guide covers each piece in the detail a first build needs, plus what's changed in 2026 that makes some of the old advice wrong.
What's changed about building a PC in 2026
Every year's build advice ages. 2026 aged more of it than usual. Five things shifted from 2023 or 2024 that will change what you buy, in what order, and how much you spend.
The first is RAM. A 32GB DDR5-6000 kit that ran $80 to $120 in mid-2025 sits at $400 to $470 in 2026 per Tom's Hardware's tracker, and 64GB kits are north of $800. Our RAMageddon buying guide covers why (AI data center demand, tight SK Hynix supply through 2030, memory contract prices climbing as much as 89% in a single quarter). The number that matters for a build in 2026 is that RAM is the least-optional line item on the spec sheet and the one most people underspec.
GPU pricing is the second shift. NVIDIA skipped 2026 entirely for new gaming cards. The RTX 60 series is delayed to at least 2028, which means the RTX 50 series (5060, 5060 Ti, 5070, 5070 Ti, 5080, 5090) is the NVIDIA lineup for the next 18 months minimum. That's already showing up in pricing, with the RTX 5080 climbing from its $999 MSRP into the $1,550 to $1,700 range across major trackers this year, and the RTX 5090 sitting between $4,500 and $5,000 for mainstream models per Tom's Hardware's live GPU tracker.
The third is X3D dominance. AMD's Ryzen 7 7800X3D, 9800X3D, and the newer 9850X3D released early 2026 are the top gaming CPUs on the market. If you're building a gaming-first PC, an AM5 X3D chip is what to spec. Intel's Arrow Lake refresh (Core Ultra 200 series) competes in productivity but trails X3D in games.
Anti-cheat lockdowns are the fourth. Battlefield 6 launched requiring Secure Boot and TPM 2.0 on the Windows side, and the trend is spreading. Modern DIY builds now need those enabled in BIOS before Windows install, not after. Our Battlefield 6 best settings guide covers the anti-cheat requirements alongside the in-game settings that squeeze the most frames out of the game. SteamOS and Linux distributions are locked out of any game with this requirement, so the OS decision matters more than it used to.
Finally, VRAM. 8GB cards are getting punished at every resolution above 1080p, and 12GB is the practical floor for a 2026 build. 16GB is the smarter buy at any tier above entry. Any first build spec'd for the next three years should skip the 8GB variants of the RTX 5060 and RX 9060 XT.
The parts you need for a 2026 gaming PC
A modern build has ten mandatory pieces plus the operating system. Skip any of them or cut corners on the wrong one and the whole build limps. Here's what each one does, what we'd spec at each tier in 2026, and the honest trade-offs.
CPU (Central Processing Unit)
The CPU handles everything the GPU doesn't. In games that means AI, physics, world simulation, and feeding the graphics card. For a gaming-first build in 2026, the AMD Ryzen 7 7800X3D is the value pick, the Ryzen 7 9800X3D is the sweet spot, and the 9850X3D is the top of the enthusiast tier. All three are AM5 socket. The 3D V-Cache on X3D chips gives a real advantage in high-refresh gaming that no Intel chip currently matches. If your build is mixed gaming plus content creation, a Ryzen 9 9950X3D (16 cores) or an Intel Core Ultra 9 285K trades some raw gaming performance for multi-threaded productivity. Entry-tier builds around $1,000 use a Ryzen 5 9600X, still AM5, which handles 1080p and light 1440p gaming without breaking a sweat.
CPU Cooler
AMD's Ryzen 7000 and 9000 chips run hot under load. 90 degrees Celsius in a stress test is normal for these; 90 degrees mid-game is a cooling problem. A 240mm AIO is the minimum for X3D chips. A 360mm AIO gives more headroom for long rendering runs or overclocking, and it's what we spec on the higher-tier builds we ship. If you're going air, the Thermalright Peerless Assassin 120SE is the well-reviewed budget option that handles a 65W chip like the 9600X. Don't bother with the stock cooler on any X3D chip; they don't ship with one.
GPU (Graphics Card)
The GPU carries the resolution and the frame rate. For 1080p high refresh, an RTX 5060 Ti 16GB or RX 9060 XT 16GB is the entry spec. For 1440p, our 1440p buying guide lays out the tiers: RTX 5070 or RX 9070 as the sweet spot, RTX 5070 Ti or RX 9070 XT for 1440p 240Hz or a foot in 4K. For 4K, our 4K gaming guide covers when it's worth the money (spoiler: for most people it isn't in 2026) and which cards handle it well (RTX 5080 minimum for 4K/60, RTX 5090 for 4K/high-refresh). If you're on a real budget, our Arc B580 vs RX 9060 XT breakdown covers the two best sub-$500 options.
Motherboard
The motherboard doesn't add fps, but it sets the ceiling on what's possible. For AMD, get an AM5 board with a B650, B850, X670, or X870 chipset. AMD publicly committed to supporting AM5 through 2029, so the socket has upgrade path built in. For Intel Core Ultra 200 series, LGA1851 with a Z890 or B860 chipset. A decent B650 or B850 board runs $150 to $220 and covers everything a gaming build needs. Higher-end X870E boards ($300+) add PCIe 5.0 lanes and better VRMs for overclocking. Skip anything cheaper than a $130 board if you plan to upgrade the CPU later; the VRMs can't handle it.
RAM (Memory)
32GB DDR5-6000 is the 2026 gaming floor. Our RAM sizing guide covers the exact math (modern UE5 games pull up to 16GB on their own, Windows 11 idle is 4 to 5GB, background apps eat another 4 to 8GB), and 32GB is what leaves headroom without swapping to SSD. 16GB used to be the sweet spot for gaming builds a couple of years ago; that number moved in 2026 as game engines got hungrier and Windows overhead crept up. Buy a matched 2x16GB kit rated for CL30 at DDR5-6000 on AMD platforms, which is the AMD Expo sweet spot for X3D chips. For hybrid gaming and content creation, 64GB is the number, and our hybrid work and gaming guide walks through when to spec it.
Storage
A single 1TB Gen 4 NVMe drive is the minimum in 2026. 2TB is the smarter spend since Windows 11 plus a small game library fills a 1TB drive faster than most first builders expect. Modern games stream assets off the drive as you play, and a SATA SSD (or worse, a spinning HDD) causes mid-match hitching that looks like an fps problem but is actually storage. If you need more storage down the line, add a second NVMe or a large 4TB HDD for cold storage. Skip the SATA SSD tier entirely.
Power Supply (PSU)
PSU is the part budget builds cheap out on the most and where cheapness comes back the hardest. A quality 80+ Gold-rated unit with headroom for the GPU tier you picked is the honest floor. For an RTX 5060 Ti or RX 9060 XT build, 650W is enough. For an RX 9070 XT or RTX 5070 Ti, 750W to 850W. For an RTX 5080, 850W. For an RTX 5090, 1000W minimum with a native 12V-2x6 connector (formerly 12VHPWR). Cheap PSUs on cards that pull 300W with transient spikes are the number one warranty ticket we see. It's the cheapest expensive lesson to skip.
Case (Chassis)
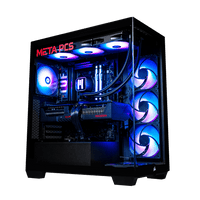
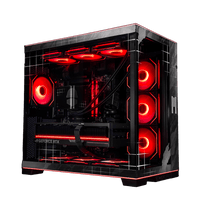
The case decides what fits and how hot it runs. A mid-tower ATX case is the safe default; it fits standard motherboards, full-size GPUs (some current 5090 variants are 400mm+ long, so check clearance), and 360mm radiators up top. Airflow matters more than looks. Prioritize mesh front panels over fully glass fronts, since glass restricts intake air and pushes GPU temps up. Small form factor and Mini-ITX builds are cool but harder for a first build; go standard ATX for the first go.
Operating System
Windows 11 is the default in 2026. You'll need a USB drive (8GB or larger) to make an installer. SteamOS is a real option if your library is entirely Steam-native, but it's locked out of any game requiring Secure Boot anti-cheat (Battlefield 6, Valorant, and a growing list of others). Our SteamOS vs Windows 11 breakdown covers the trade-offs in detail.
2026 build tiers at a glance
What each price bracket buys you in 2026, plus the closest ready-to-ship match from our lineup so you can benchmark parts pricing against a fully-assembled build with lifetime US-based support included.
Quick note before the table: the Entry tier ships on legacy AM4 with DDR4 to keep the sub-$1,300 price honest. Every tier above it sits on modern AM5 with DDR5, which is where the platform upgrade path lives. So if you're picking between Entry and Mainstream, the $300 to $400 difference buys you more than frames today. It buys you the option to drop a next-gen X3D chip in three years without replacing the board and RAM.
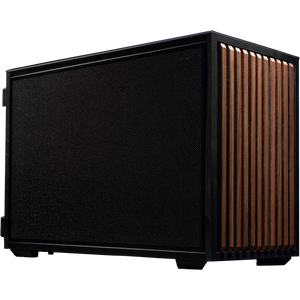
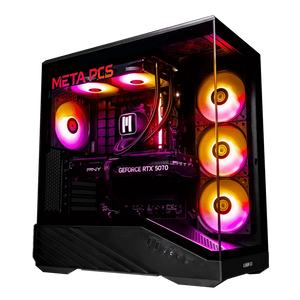
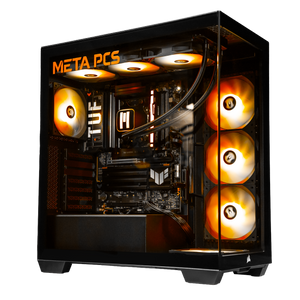
Full specs and pricing for each ready-to-ship match live on the product pages. Entry: Cyclone and Deepcore. Mainstream: SHADE v3 and Phantom v4. Sweet spot: V1SHADOW50 v3 and Nightwalker v2. Enthusiast: TROOPER, or the no-GPU Beacon and Portal chassis for a bring-your-own RTX 5080 or 5090 build.
Compatibility check before you order
The most expensive first-build mistake is buying parts that don't play together. Six checks that catch 99% of the compatibility problems we see in the shop when someone brings in a build that won't POST.
CPU and motherboard socket match. AM5 CPU needs an AM5 board (B650, B850, X670, X870, X870E). Intel Core Ultra 200 series needs LGA1851 (Z890, B860). This one is obvious but people still trip on it, especially when reusing an older AM4 board with a new Ryzen 9000 chip. AM4 is 5000-series and older; AM5 is 7000/9000.
RAM type matches the platform. AM5 and LGA1851 are DDR5-only. You cannot install DDR4 in an AM5 board and vice versa. The notch position is different so it physically won't fit, but people still order the wrong kit.
GPU length fits the case. Current RTX 5090 variants can run 400mm+ long. Check the case's stated GPU clearance against the specific card model, not just the reference length. Mid-tower cases usually support 350 to 400mm; small form factor cases can cap at 300mm.
PSU wattage covers the total load with 20% headroom. Total the CPU TDP plus the GPU TDP plus 100W for everything else, then add 20% for transient spikes. An RTX 5080 (up to 400W) plus a 9800X3D (170W) plus 100W other plus 20% headroom = around 800W minimum. Round up to 850W or 1000W.
PSU has the right GPU power connector. Modern high-end NVIDIA cards use the 12V-2x6 connector (the updated version of 12VHPWR). Older PSUs use 8-pin PCIe. A card that expects 12V-2x6 can run off adapter cables from 8-pin, but the cleaner build is a modern PSU with a native 12V-2x6 output. RTX 5080 and 5090 in particular want this.
Motherboard has enough M.2 slots for the SSDs you want. Most current AM5 boards have two or three M.2 slots. Check that at least one is Gen 4 or Gen 5 for the boot drive. Older boards may only have one M.2, which limits upgrade paths.
Tools and workspace prep
The tool list is short. A #2 Phillips-head screwdriver (magnetic is nice, not required), a small container for screws, and either an anti-static wrist strap or a bare metal surface to touch every few minutes to ground yourself. If your case comes with cable ties, keep them. Otherwise a few basic Velcro straps or zip ties help with cable management at the end.
Work on a flat surface with room to spread out. The motherboard box makes a fine platform for the initial CPU-and-cooler install before the board goes in the case. Good lighting matters more than most guides say. Small motherboard connectors are much easier to identify when you can see them clearly.
Step-by-step: building the PC
Twelve steps. Most first builds take two to three hours. Take the time to double-check each step before moving to the next one, since a missed connection or unseated part is the source of almost every "it won't turn on" call.
- Prep the motherboard outside the case. Place the motherboard on top of its anti-static bag or the box it came in. Never on the bare cardboard flap; the ridges can catch component pins. Working outside the case for the first few installations saves you back pain and gives you room to see what you're doing.
- Install the CPU. Open the socket retention arm on the motherboard. Line up the small triangle on one corner of the CPU with the matching triangle on the socket. Lower the CPU straight down without tilting or forcing it. If it's aligned right, it drops in with zero pressure. Close the retention arm. The arm will require noticeable force to close, which is normal for AM5 and LGA1851 sockets.
- Install the M.2 SSD (if applicable). This is the easiest time to install the boot drive. Find the primary M.2 slot (usually the top one, labeled M.2_1 or similar in the manual). Remove the retention screw at the far end of the slot. Slide the SSD in at a 30-degree angle until the pins seat fully, then press it flat and secure with the retention screw. Add the thermal pad or heatsink if the motherboard includes one.
- Install the CPU cooler. For an AIO, mount the CPU block on the CPU with the cooler's included brackets, apply a pea-sized drop of thermal paste to the center of the CPU (unless the cooler came with paste pre-applied), and set the radiator aside for case mounting later. For an air cooler, same paste step, then attach the cooler brackets and hand-tighten in a diagonal pattern to spread pressure evenly. Plug the cooler's fan or pump cable into the CPU_FAN header on the motherboard. Missing this connector is the number two reason a build won't POST.
- Install RAM. Look at the motherboard manual for the correct dual-channel slots (almost always slots A2 and B2, the second and fourth from the CPU). Open the retention clips on those slots, align the notch on the RAM stick with the notch in the slot, and press firmly straight down until both clips snap back into place. If it doesn't snap, don't force it. Reseat and try again.
- Mount the motherboard in the case. Install the I/O shield in the back of the case if it isn't already attached to the motherboard (most current boards have it pre-mounted). Check that the case standoffs are in the right positions for your motherboard size (ATX, mATX, ITX). Lower the motherboard in at an angle, aligning the rear ports with the I/O shield first, then set it flat. Secure with the six to nine screws that came with the case. Snug, not overtight.
- Install the PSU. The PSU mounts at the bottom rear of most modern cases. Fan facing down if the case has a bottom vent (most do), fan facing up if it doesn't. Slide it in and secure with four screws at the back. If your PSU is modular, plug in the 24-pin motherboard cable, the 8-pin CPU cable, the PCIe power cables you'll need for the GPU, and any SATA power cables for extra drives. Route them through the case's cable management channels before you connect the other end, since it's much easier to route now than after everything's installed.
- Connect the front panel and case cables. This step is the most annoying part of any build. Small connectors, tiny labels, the motherboard manual is your friend here. You'll connect the power switch, reset switch, power LED, HDD LED, front-panel USB (2.0 and 3.0 or USB-C separately), and front-panel audio. Take your time and consult the manual for the exact pin layout. LEDs have polarity (positive and negative); switches don't. If the power button doesn't work on first boot, this is usually the culprit.
- Install the GPU. Identify the top PCIe x16 slot on the motherboard. Remove the corresponding case slot covers on the back (usually two or three for modern cards). Hold the GPU by its edges (never touch the PCB contacts) and align it with the slot and the case opening. Press straight down firmly until the retention clip on the motherboard clicks. Secure the GPU to the case with the screws you removed with the slot covers. Connect the PCIe power cables from the PSU. Modern high-end cards use the 12V-2x6 connector; seat it fully or the card won't power up (and can damage the connector if under-seated). GPU support brackets or anti-sag brackets are worth using on any card 300mm or longer to prevent PCIe slot damage over time.
- Install extra storage. Any additional NVMe drives go in secondary M.2 slots (same install process as step 3). SATA SSDs mount in dedicated 2.5-inch drive bays or brackets in the case, then get a SATA data cable to the motherboard and a SATA power cable from the PSU. 3.5-inch HDDs go in the drive cage with their own screws or tool-less trays.
- Cable management and final check. Route all cables through the case's back cutouts. Use the included Velcro straps or zip ties to bundle them behind the motherboard tray. Good cable management improves airflow and makes future upgrades easier. Before closing the case, run a final check: cooler fan plugged in, RAM fully seated, GPU latched and powered, all PSU cables connected, no loose screws inside the case. Then close the side panels.
- First power-on outside Windows. Plug in the monitor to the GPU (not the motherboard, unless you're using an APU without a discrete GPU). Plug in keyboard and mouse. Flip the PSU switch to on. Press the case power button. If the fans spin and the motherboard's POST screen or BIOS logo appears, the hardware is good. If nothing happens, don't panic; work through the checklist (CPU power cable, RAM seating, front panel connector polarity). If it powers up but shows no display, the GPU or monitor cable is the usual suspect.
First-boot BIOS setup (this is where most guides stop and shouldn't)
Most competitor build guides end at "install Windows." That skips the three BIOS steps that make the difference between a working build and a build that plays every 2026 game at full performance.
Boot into BIOS by pressing Delete or F2 during the first power-on (the exact key depends on your board; most Asus and MSI boards use Delete, most Gigabyte boards use Delete or F2). Once you're in:
Enable your RAM's XMP or Expo profile. Out of the box, DDR5 runs at a default speed like DDR5-4800, not the DDR5-6000 you paid for. Look for an option called XMP (Intel) or Expo (AMD) in the BIOS overview and enable it. This is a free performance win most first builders miss.
Enable Resizable BAR. Modern AMD Radeon and Intel Arc cards need this on to hit their designed performance. On the AMD side it's usually called Above 4G Decoding plus Re-Size BAR Support or Smart Access Memory, all under the Advanced or PCIe section. NVIDIA cards see smaller gains, still worth turning on. Our free FPS boost guide covers this in detail with real benchmark data.
Enable Secure Boot and TPM 2.0. Modern anti-cheat systems (Battlefield 6, Valorant, and a growing list of others) refuse to launch without these enabled. Look under the Boot or Security tab for Secure Boot; on Asus boards you'll switch OS Type from Other OS to Windows UEFI. TPM 2.0 is usually under Advanced or Security as fTPM (AMD) or PTT (Intel). Turn both on. If you get an error about missing security keys on Secure Boot, use the option to install default keys.
Save and exit BIOS. The PC reboots with the correct RAM speed, Resizable BAR active, and Secure Boot ready for Windows install.
Windows install and drivers
Plug in the USB drive with Windows 11 installation media (created via Microsoft's Media Creation Tool on another PC). Boot from USB (F11 or F12 during POST for most boards to bring up the boot menu). Walk through the Windows installer, pick your NVMe drive as the target, let it copy files and reboot. First boot into Windows takes about 20 minutes total, including the setup screens.
Driver install comes next. For NVIDIA GPUs, download the NVIDIA App (it replaced GeForce Experience) directly from nvidia.com. For AMD GPUs, AMD Adrenalin from amd.com. For chipset drivers, grab the AMD Ryzen Chipset Driver from AMD's site (for AM5 builds) or Intel's chipset driver package for LGA1851. Motherboard-specific drivers (LAN, audio, USB) install from your motherboard maker's support page for your exact model. Skip any "driver installer" utility that came on a disc; the versions online are always newer.
Once drivers are in, our First 6 Things to Do After Building a Gaming PC walks through the rest of the setup (monitor refresh rate configuration, Windows Game Mode, background app cleanup, and stress testing) before you install your first game. If you're deciding which cable to plug into the GPU, our DisplayPort vs HDMI for Gaming breakdown covers when each wins.
Common first-build mistakes we see in the shop
These are the ones customers bring in with builds that won't POST or won't perform. Every one is preventable.
Forgetting the CPU power cable. The motherboard needs a separate 8-pin (or 4+4-pin) EPS connector near the CPU socket in addition to the main 24-pin ATX cable. Miss it and the system won't boot. This is the single most common cause of a "my new PC won't turn on" call.
Underseated RAM. DDR5 kits need noticeable force to fully seat. If both retention clips don't snap back, the RAM isn't in all the way and the system won't post. Reseat firmly.
Wrong RAM slots. Most dual-channel kits go in A2 and B2 (second and fourth from the CPU), not A1 and B1. Consult the motherboard manual for the exact layout on your board.
GPU in the wrong PCIe slot. Modern GPUs go in the top x16 slot for full bandwidth. Secondary PCIe slots may run at x4 or x8 electrically, which throttles the card.
Cheap PSU under a real GPU. A no-name 750W PSU driving an RX 9070 XT is asking for a crash under load. Stick with quality units from Corsair, Seasonic, EVGA, be quiet!, or Super Flower. 80+ Gold minimum, 80+ Platinum for high-end builds.
Skipping thermal paste. If your cooler doesn't come with paste pre-applied on the block, you have to apply it yourself. A pea-sized dot in the center of the CPU is right; don't spread it manually. The pressure of the cooler spreads it evenly.
Not enabling XMP or Expo. Your $400 DDR5-6000 kit runs at DDR5-4800 out of the box until you enable the memory profile in BIOS. A 25% frequency gap on RAM shows up as real frame time inconsistency in games.
Case with no airflow. Fully glass front panels look great and choke intake air. Prioritize mesh fronts or at minimum cases with generous side and top venting. Cooler cards last longer, and shaving even 5 to 10 degrees Celsius off sustained GPU temps pays off over years of use.
When it's smarter to buy prebuilt (the honest answer)
We build custom and prebuilt PCs for a living. We also tell customers not to buy from us when buying isn't the right call. Here's when DIY makes sense and when a prebuilt is the smarter spend.
Build it yourself if you want the learning experience, you enjoy the process, you want a completely custom parts list (specific case, specific cooler, specific RGB), or you're willing to spend a weekend and troubleshoot if something goes wrong. The savings over a prebuilt in 2026 are smaller than they were in 2020 (RAM and GPU prices compress the margin), but the customization and skill-build are still real reasons to DIY.
Buy a prebuilt if you want the machine tested and running out of the box, you want warranty coverage on the whole system (not just individual parts), you don't want to source RAM at $400 and GPUs at scalper-adjacent pricing yourself, or you value the time savings. A shop build ships with Secure Boot, TPM 2.0, Resizable BAR, and XMP/Expo already enabled, drivers installed, and a stress test on the record. Every META PCs system ships with lifetime US-based support, which means when a component fails in year three, you call us and we handle it. Our Best Prebuilt Gaming PC guide covers what separates a good prebuilt from a bad one at any price tier if you're comparing us against other shops.
Frequently Asked Questions
How much does it cost to build a gaming PC in 2026?
An entry gaming PC that handles 1080p high-refresh at high settings runs $1,000 to $1,200 in 2026. A 1440p mainstream build lands $1,700 to $2,000. The sweet spot for 1440p high-refresh (7800X3D or 9800X3D paired with an RX 9070 XT or RTX 5070) sits at $2,300 to $2,700. Enthusiast 4K builds with an RTX 5080 or 5090 run $4,000 to $6,500 depending on the card. RAM and GPU prices are the volatile line items; check Tom's Hardware's GPU price tracker before ordering.
Is it cheaper to build a PC than buy one in 2026?
Marginally. The gap has closed significantly since 2020. Building saves you $100 to $300 on a $2,000 build compared to a prebuilt with equivalent parts, once you factor in the OS license and shipping on individual components. Prebuilts from shops that offer lifetime support and stress testing (like ours) often come out about even on total cost of ownership when you include warranty coverage.
What's the easiest first PC build for a beginner?
A Ryzen 5 9600X on an AM5 B650 board with 32GB of DDR5-6000, a 1TB Gen 4 NVMe, an RTX 5060 Ti 16GB or RX 9060 XT 16GB, a 650W 80+ Gold PSU, a Peerless Assassin air cooler, and a mid-tower ATX case with mesh airflow. Every part is forgiving to install, everything is DDR5 and PCIe 4.0 without newer standards to worry about, and the build handles 1080p high-refresh and 1440p high without stress.
How long does it take to build a gaming PC?
Two to three hours for a first build, once your parts are all in front of you. Experienced builders can do it in an hour. Windows install and driver setup adds another hour on top of that. Plan a Saturday afternoon and don't rush.
Do I need Secure Boot and TPM 2.0 for gaming in 2026?
For a growing list of games, yes. Battlefield 6's anti-cheat requires both enabled at the BIOS level. Valorant, some Call of Duty titles, and other competitive games have similar requirements. Enable them in BIOS before Windows install. If you skip it, some games will refuse to launch and the fix requires a BIOS trip after the fact.
What's the best CPU for a 2026 gaming PC?
For gaming-first builds, the AMD Ryzen 7 7800X3D at the mainstream tier, the 9800X3D at the sweet spot, or the 9850X3D at the enthusiast tier. All are AM5, all use 3D V-Cache to lead in gaming performance across the market. Intel's Core Ultra 200 series is competitive in productivity but trails X3D in games.
Can I use my old parts in a new build?
Some parts, not others. A quality PSU from a Gold-rated unit under three years old is fine to carry over if it has the wattage headroom for the new GPU. Cases are fully reusable if the form factor works. NVMe SSDs and SATA drives carry over. RAM does not carry between DDR4 and DDR5 platforms. CPUs don't carry between AM4 and AM5 or between Intel LGA1200/1700 and LGA1851. Motherboards don't carry between CPU generations if the socket changes.
Ready to build
Building a gaming PC in 2026 is a real accomplishment, and it's also more expensive than it was in 2023 for reasons that aren't the builder's fault. The parts are more sophisticated, the anti-cheat requirements are stricter, and the RAM and GPU markets are what they are. Nothing above changes on a fundamental level whether you build it yourself or have us do it. Every part, every step, and every BIOS setting is the same. The difference is who's doing the work and who's holding the warranty.
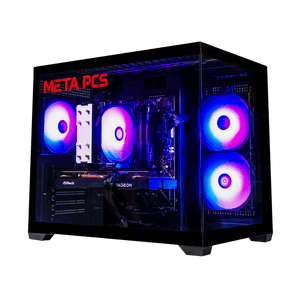
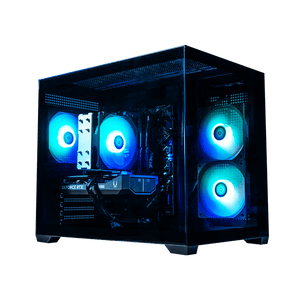
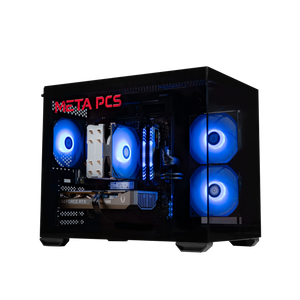
If you'd rather skip the assembly, the META PCs ready-to-ship lineup covers every tier from the Cyclone at $1,149 through the enthusiast Nightwalker v2 and Icewalker v2. Every one ships tested, on lifetime US-based support, and with the BIOS trip already done for you. The custom PC builder handles any spec that isn't on the shelf. Our accessories collection stocks the cables, keyboards, and monitors we recommend to pair with any build.
Whether you built it yourself or unboxed one from us, the first six things to do after building a gaming PC walks through the rest of the setup before you launch your first game.