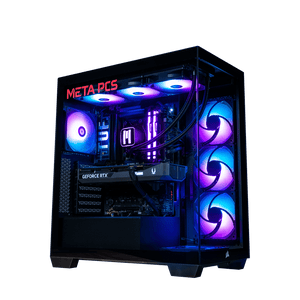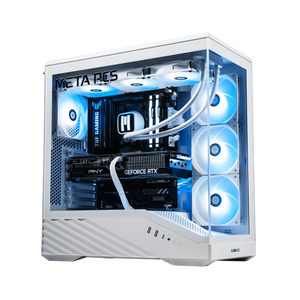
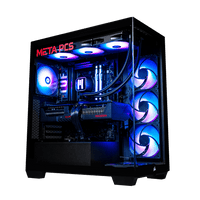
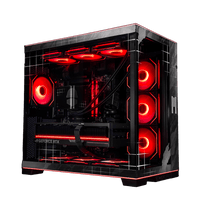






The build is complete. The POST worked, Windows is installed, and you’re sitting here staring at the desktop asking yourself if the build is truly complete.
It isn’t. The vast majority of gaming computers come up for the first time in an only partly set up state. These are the six things that are worth doing before playing your first game:
- Setting fan curves
- Configuring the BIOS
- Setting up the GPU
- Checking the storage
- Configuring the monitor
- Running one stress test with a restore point set
The difference between getting a properly performing computer and merely having one that works is just about an hour of configuration that nobody tells you about. Check out the video below, or continue reading for the details that were too much for eight minutes.
1. Set up your fan curves
The stock fan curve on your motherboard will be fine. It does not damage anything, but it tends to keep your fans spinning more than they need to at moderate temperatures, which gets noisy.
A good starting point for a custom curve is silent (not zero!) under 60 degrees, linear from 60 to 80 degrees, and maxed out over 80 degrees. Adjust from there. Silent during browsing and noisy only when the hardware really needs it.
It should be set up in BIOS within the fan control section. Modern motherboards usually offer a possibility to create graphs by dragging the points. You will need to do that separately for the CPU fan, case fans, and AIO pump if you have one. The case fans can spin slower than the CPU fan because they work to cool down the entire chassis.
Some boards let you export the fan curve profile to a USB drive so that a CMOS reset will not wipe it out. If possible, try to go for the PWM fans instead of DC. PWM is better when working at lower speeds.
2. Configure your BIOS settings
This is the step that is skipped by most builders, and it will cost you the most in terms of performance. Four settings in just three minutes.
Enable EXPO (XMP)
The maximum speeds of your DDR5 kit are 6000 MHz or 6400 MHz or whatever stated on the box. However, out of the box, it comes with a speed of 4800 MHz, which is the JEDEC default standard required by any DDR5 module to start.
EXPO (AMD) or XMP (Intel) will load the manufacturer’s fastest speed profile. For AM5 motherboards with 7000 or 9000 series Ryzen CPUs, it is just one click away.
In case you experience crashes or boot loop using EXPO, revert to the JEDEC settings. Some modules have compatibility issues with certain CPUs and motherboards.
Turn on Resizable BAR
Resizable BAR allows your CPU to view the entire GPU VRAM in one go. FPS gains in real-life range between a few percent to over 10% depending on the game. More performance for free, in most games. Enabled under advanced or PCIe settings.
Make sure that CPU boost is enabled
All current chips boost themselves over base clock. So Ryzen 9 9950X3D runs at 4.3 GHz base, but boosts itself to 5.7 GHz in lightly threaded loads, such as most games.
The option is Core Performance Boost on AMD and Turbo Boost on Intel. It is usually enabled by default, but some boards come with it being off or set to auto. Make sure it is enabled.
Enable Secure Boot and TPM 2.0
Both required by Windows 11. Secure Boot is under boot options, TPM 2.0 is under security options. If Windows 11 was installed and running, they should be enabled already, but just in case.
Side note for first-time builders: MSI boards make this much easier as their BIOS is one of the easiest to use out there, with sections named in plain English and with actual working search feature.
3. Set up your graphics card
Here are two easy things.
First, install the NVIDIA App if your graphics card is NVIDIA. It replaces GeForce Experience and the old NVIDIA Control Panel, so you'll have all the driver updates, game configurations, and overclocking options in one place.
Perform Automatic Tuning for the GPU right after installing it. This process takes 10 to 20 minutes and determines what your particular card can support. Each graphics card has some individual features because of silicon variance, so tuning on one MSI RTX 5070 Ti Gaming Trio OC will be slightly different from the same card on another PC. Free boost you’ll never get otherwise.
Second, enable Hardware Accelerated GPU Scheduling. Go to Settings – System – Display – Graphics and toggle it on. Then restart your PC. The GPU schedules itself with less help from the CPU.
4. Verify your storage drive
If you’ve got more than one storage drive, then Windows may not be installed on the fastest one by default. If your NVMe was sitting idle and Windows has installed on a SATA SSD, then all of the performance will be sub-optimal.
Use Disk Management to locate the OS drive. You can open it via the context menu of Start or by pressing Windows+X and selecting Disk Management from the menu. Your OS drive will typically be the C:\ drive and may show labels such as Boot and Page file.
If Windows is not on the right drive, then you need to reinstall it properly and clean the old one or use a tool like Clonezilla to clone the partition to the right drive.
For reference, an NVMe drive like MSI Spatium M480 Pro delivers about 7,000 MB/s in sequential reads while a SATA SSD gets about 550 MB/s in the same test.
5. Set up your monitor
By default, Windows sets each new monitor to 60Hz. If you purchased a 144Hz, 240Hz, or even 360Hz monitor and didn’t do this step, you’re getting only a tiny part of the value you paid for.
Choose the refresh rate manually. Settings, System, Display, Advanced Display settings. Choose the correct value from the drop-down menu.
And enable G-Sync in case you use an NVIDIA graphics card or FreeSync if your graphics card is AMD. Both options can be found inside their respective software. This eliminates screen tearing without increasing input lag from V-Sync.
If your monitor supports HDR technology, turn it on in Windows settings and calibrate the brightness slider for SDR content to 40 percent, as everything higher will wash out the picture, while lower values will make SDR content look too dark.
Connection tip: use DisplayPort instead of HDMI. Especially important if you use ultra-wide monitors such as the MSI MPG 341CQR QD-OLED X36. HDMI 2.1 can technically do 360Hz at 10-bit HDR, but only with Display Stream Compression, and if you’re adding another monitor later you don’t want to be limited. DisplayPort gives you more bandwidth and helps to avoid problems when connecting the second monitor.
6. Run a stress test and create a restore point
Two final items before you run a game.
Stress test using OCCT for 10 minutes in both CPU and GPU modes. Write down the highest temperatures. The healthy under-load temperature should range between 60-80 degrees Celsius for the CPU and 60-75 for the GPU. OCCT pushes harder than any game will, so seeing the CPU sit near 90°C here isn't automatically a problem. What matters is whether it throttles or crashes, or whether it hits the same numbers during normal gaming. If it does, check your fan curve, case airflow, and cooler mounting.
Lastly, create a Windows restore point. Search for “Create a restore point” in the Start menu, click on Create and name the restore point as “Fresh Build”. Two minutes now could save you a lot of time reinstalling everything three months later due to some driver or software conflict.
Common errors to avoid
Some common pitfalls that everyone tends to stumble upon during their first PC build.
- Don’t connect your monitor directly to the motherboard. If you have integrated graphics in your processor, Windows will use that instead of your GPU, likely the single most expensive part in your build. Connect to your GPU.
- Don’t install all the RGB software packages. iCUE, Synapse, Aura, Mystic Light – all of them competing to control your lights. Install only one, typically the one for your motherboard.
- Wait a couple of days before benching your PC. Windows continues downloading updates in the background even after a new installation. Any benchmarks run before that will show numbers lower than your actual results.
- Don’t ignore the BIOS configuration. The quickest section in the list, the biggest performance boost. Do it.
What if you purchased a prebuilt?
Most of this is done at the factory. The EXPO profile is turned on, fan curves set, drivers installed, temperatures checked – all before your machine leaves the factory. For more information about a built system, check out our Night Reaper build post for detailed information about target temperatures and benchmarking results.
For those who would rather just select components, but not deal with the actual build process, our custom PC builder sets your specs to the same standards before the machine is shipped.
If you don’t have a Saturday or Sunday to build your own system, we have our ready to ship gaming machines that will be shipped right to you.
FAQ
Do I have to upgrade the BIOS after building my PC?
If your CPU is not supported by the current BIOS version, then yes – but you would have already figured that out because your computer would have never booted. So, otherwise, no. Almost any modern AM5 motherboard comes with a newer BIOS capable of booting Ryzen 7000 and 9000 series CPUs. You can check your motherboard’s product page for the version shipped and compare it to the CPU’s compatibility list.
How long should I stress-test my new PC?
It takes 10 minutes to stress test with OCCT combined load. In order to thoroughly test your PC, Prime95 should be used to stress test the CPU and 3DMark the GPU, but 10 minutes will do in this case.
What are safe temperatures for a gaming PC?
Load temperatures of a healthy CPU range from 60 to 80°C. The load temperature of the GPU is within 60 and 75°C. Synthetic tests like OCCT can push higher than that without it being a problem. If temps climb past 90°C during actual gaming, or you see throttling, check your fan curve, case airflow, and cooler mounting. Idle temperature depends on the room temperature, but it should be between 30 and 45°C.
Which comes first – Windows updates or GPU drivers?
The former. Windows makes an attempt to install its own basic GPU driver during installation, which is then upgraded with the help of the NVIDIA App or the AMD Adrenalin install process. So do Windows updates, then drivers, then everything else.
Ready to game
Go through those six steps and you will have your gaming PC configured exactly as advertised. Fan curves for minimal noise, BIOS for maximum performance, graphics card tuned, storage verified, monitor calibrated, and a fresh baseline to go back to.
Or, if setting all of this up by yourself is more than what you had in mind, our ready to ship builds come with everything already sorted out.